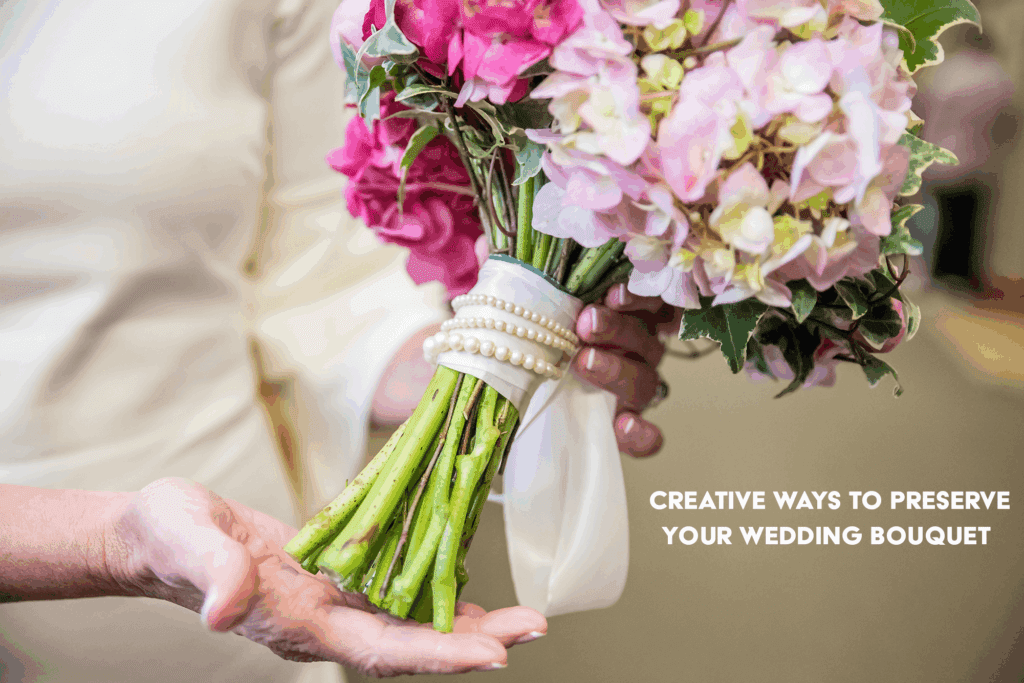
Creative Ways to Preserve Your Wedding Bouquet
Wedding bouquet preservation helps you turn your bridal flowers into a lasting keepsake using simple DIY methods, so you can hold onto the beauty, emotions, and memories of your day.
Your wedding day combines emotions, laughter, flower arrangements, and unforgettable moment.
And in the middle of all the beautiful arrangements and emotions, your wedding bouquet stands out as a vibrant symbol of your love and commitment.
It is more than just an arrangement of flowers; it is a beautiful beginning for your forever promise.
So, it is only natural to want to hold onto that beauty long after the “I do’s” have been said.
But how do you keep those delicate blooms from fading away like a distant memory?
There are countless creative and meaningful ways to preserve your wedding bouquet.
How to transform your wedding flower bouquets into a cherished keepsake that will remind you of your special day for years?
Let us explore the wonderful world of wedding flower preservation and discover how to save your wedding bouquet using simple DIY methods that reflect your style and personality. In this blog post we will cover
- Why preserve your wedding bouquet?
- Important considerations for bridal bouquet preservation
- How to preserve wedding flowers – DIY methods
- Creative ways to preserve your wedding bouquet
- Preserving your wedding bouquet at home
Why Preserve Your Wedding Bouquet?
Before we get into the “how-to,” let’s appreciate the “why.” Why preserve your wedding flowers?
- A Token of Love: Your bouquet is a direct link to one of the most significant days of your life. Preserving it allows you to hold a piece of that memory in your hands after a long time.
- Symbolic Value: Each flower in your bouquet from elegant roses to other handpicked blooms likely holds a special meaning, chosen for its symbolism or personal significance. Preserving these blooms keeps that meaning alive.
- A Unique Keepsake: Photographs or videos are memory keepsakes. and preserved bridal bouquets can remain as a beautiful piece of art and a reminder of your wedding.
- Forever Favourite: With proper preservation, your bouquet can become a family heirloom, passed down through generations, telling the story of your love.
Important Considerations for Bridal Bouquet Preservation
Timing and preparation are the key when you decide to preserve your wedding bouquet. The fresher your flowers are, the better the preservation results will be. Here are some crucial tips to keep in mind.
- Act Fast: The sooner you start the preservation process after your wedding, the better. Ideally, within the first 24-48 hours. The longer you wait, the more the flowers will naturally droop and wilt.
- Handle with Care: Your bouquet has likely been handled a lot during the wedding day. Be gentle when transporting and preparing it for preservation to avoid further damage to the petals and stems.
- Keep it Hydrated (Temporarily): If you can’t start the preservation process immediately, place your bouquet in a vase with fresh water, away from direct sunlight and heat. It will help keep the flowers hydrated for a short period.
- Consider a Professional: If you opt for professional preservation, research and book a service well before your wedding. It will provide specific instructions for handing over your bouquet.
How to Preserve Wedding Bouquet at Home – Simple DIY Methods
Preserving your wedding bouquet at home can be a rewarding and personal project. Let us explore some of the popular, simple and effective DIY techniques that offer incredible results.
1. Air Drying: The Simple Method
Air drying is the most traditional way to preserve flowers. It is budget-friendly and creates a lovely, rustic aesthetic.
How to Air Dry Your Wedding Bouquet?
- Preparation: Remove any excess foliage from the stems. If your bouquet is very dense, consider separating it into smaller bunches to ensure even drying.
- Tie and Hang: Gather the stems together and tie them securely with twine or a rubber band. If you prefer, you can also hang individual flowers.
- Choose the Right Spot: Find a dark, dry, well-ventilated area. Attics, closets, or rarely used rooms are ideal. Avoid humid environments, as this can lead to mold.
- Hang Upside Down: Hang the bouquet or individual flowers upside down from a hook or clothesline. It helps the petals retain their shape as they dry.
- Patience is Key. The drying process can take 2-4 weeks, depending on the type of flowers and humidity levels. You’ll know they’re fully dry when they feel brittle to the touch.
Pros: Easy, inexpensive, natural look.
Cons: Flowers may shrink, and colors may fade or darken significantly.
2. Silica Gel: Retaining Shape and Color
Silica gel is a drying agent that absorbs moisture rapidly, helping flowers retain much of their original shape and color. This method is a favourite for those wanting a more vibrant and lifelike preserved flowers.
How to Preserve a Wedding Bouquet with Silica Gel?
- Gather Supplies: You will need a large airtight container (like a plastic storage bin), enough silica gel to cover your flowers, and a small paintbrush.
- Prepare Flowers: Trim stems to about 1-2 inches.
- Layering: Pour a layer of silica gel (about an inch deep) at the bottom of your container.
- Place Flowers: Carefully place your flowers on top of the silica gel, ensuring they are not touching each other. Depending on the flower type, you can place them upright or on their side.
- Gently Cover: Slowly and gently pour more silica gel over and around each flower, making sure to get into all the crevices of the petals. Use a small paintbrush to carefully brush the gel into tight spots without damaging the petals.
- Seal and Wait: Once all flowers are completely covered, seal the container tightly.
- Drying Time: Drying time varies from a few days to a week or two, depending on the flower type and density. Check them periodically by carefully uncovering a small section. They are dry when they feel papery and rigid.
- Remove and Clean: Once dry, carefully remove the flowers from the silica gel. Gently brush off any remaining gel crystals with a paintbrush.
Pros: Excellent color and shape retention, relatively quick drying.
Cons: More expensive than air drying and requires careful handling of silica gel (wear gloves).
3. Pressing Flowers: Creating Flat, Botanical Art
Pressing your wedding flowers creates beautiful keepsakes that are perfect for framing, scrapbooking, or incorporating into other crafts. This method works particularly well for individual petals or smaller, flatter blooms.
How to Press Wedding Flowers?
- Preparation: Carefully separate your bouquet into individual flowers or petals. Trim any thick stems.
- Blotting: Place each flower or petal between two sheets of absorbent paper (like parchment paper, blotting paper, or even plain white printer paper). Avoid textured paper as it can imprint on the flowers.
- The Press:
- Flower Press: If you have a dedicated flower press, arrange your flowers between the blotting paper and cardboard layers, then tighten the screws.
- Heavy Books: If you don’t have a press, place the sandwiched flowers inside the pages of a large, heavy book. Stack more heavy books on top to apply consistent pressure
- Replace Paper:After a few days, carefully replace the absorbent paper with fresh, dry sheets. It helps prevent mold and speeds up drying.
- Patience and Checking:The pressing process can take 2-4 weeks. Check periodically until the flowers are dehydrated and feel like crisp paper.
Pros: Creates beautiful, flat pieces for various crafts, preserves intricate details of petals.
Cons: Flowers lose their shape, and color may fade.
4. Glycerine Preservation: Supple and Pliable Flowers
Glycerine preservation is a less common but effective method that replaces the water in flowers with glycerine, resulting in soft, pliable, and long-lasting blooms. This method works best for greenery and sturdier flowers.
How to Preserve Flowers with Glycerine:
- Preparation: Trim stems to about 6-8 inches and remove any lower leaves. Lightly hammer the bottom inch of woody stems to help with absorption.
- Glycerine Solution: Mix one part liquid glycerine with two parts hot water. Stir until the glycerine is fully dissolved. Let the solution cool completely.
- Placement: Place the prepared flower stems into the glycerine solution. Ensure the stems are fully submerged.
- Absorption: Keep the flowers in the solution for 1-3 weeks. As the glycerine is absorbed, you will notice the flowers feeling softer and more pliable. The color might deepen or change slightly.
- Finishing: Once preserved, remove the flowers from the solution and gently wipe off any excess glycerine. You can then air dry them to set fully for a day or two.
Pros: Flowers remain soft and flexible, long-lasting.
Cons: Color changes are common making it unsuitable for all flower types and this method is more time consuming.
5. Wax Dipping: A Protective Seal
Dipping your flowers in wax can create a protective coating that seals in their moisture and prevents wilting. This method works well for individual blooms, resulting in a beautiful, almost sculptural appearance.
How to Dip Flowers in Wax:
- Preparation: Choose fresh, fully bloomed flowers that are free from blemishes. Trim stems to your desired length.
- Melt Wax: Use unscented paraffin wax or a blend specifically designed for flower dipping. Melt the wax in a double boiler or a slow cooker on low heat until it’s completely liquid. Ensure the wax isn’t too hot (around 120-130°F or 50-55°C) to avoid cooking the flowers.
- Dip: Hold a flower by its stem and slowly dip it into the melted wax, submerging the entire bloom.
- Drain and Dry: Gently lift the flower out, allow excess wax to drip off, and then hang it upside down to dry. The wax will harden quickly.
- Repeat (Optional): For a thicker coating, you can repeat the dipping process after the first layer has hardened, ensuring the wax is still at the correct temperature.
Pros: Excellent preservation of shape and color, protective coating, and unique finish.
Cons: Flowers become heavy, may not be suitable for delicate blooms, and can be messy.
Creative Ways to Preserve Your Wedding Bouquet: Stunning Keepsake Ideas
Once your flowers are preserved, don’t just tuck them away in a box. Transform them into stunning and meaningful keepsakes you can enjoy daily.
1. Framed Art: A Timeless Display
Framing your preserved flowers is a classic and elegant way to showcase them.
- Shadow Box: For air-dried or silica-gel preserved flowers, a shadow box allows you to display their three-dimensional beauty Arrange them artfully with your wedding invitation, a favourite photo, or other small mementos.
- Pressed Flower Art: Pressed flowers are perfect for flat framing. Create a collage, a botanical design, or even a minimalist display of a single, perfectly pressed bloom.
2. Resin Art: Encapsulating Eternal Beauty
Resin art is a popular and stunning way to preserve your wedding flowers. The clear resin encases your blooms, protecting them and creating a glossy, durable finish.
- Coasters: Individual petals or small flowers can be cast into beautiful resin coasters.
- Jewellery: Tiny blooms or petals can be used to create custom resin necklaces, earrings, or rings.
- Paperweights/Blocks: A larger arrangement or even a portion of your bouquet can be cast into a clear resin block, creating a mesmerizing paperweight or decorative piece.
- Trays or Platters: Consider a resin tray with your preserved flowers artfully arranged within for a truly grand display.
3. Ornaments: Festive and Sentimental
Turn your preserved flowers into cherished ornaments to adorn your Christmas tree or display year-round.
- Clear Baubles: Place small dried flowers or petals into clear, fillable ornament baubles. You can add glitter, ribbons, or a tiny note.
- Resin Ornaments: Cast small flowers or petals into custom resin ornament shapes using molds.
4. Candles and Soaps: Infused with Nature’s Beauty
Incorporate your dried petals into handmade candles or soaps for a beautiful and fragrant reminder.
- Embedded Petals: Carefully press dried petals onto the sides of candles as they cool or mix them into soap batter before pouring them into molds.
- Decorated Exteriors: Use pressed flowers to decorate the outside of finished candles or soap bars.
5. Potpourri: A Scented Memory
If your flowers retain some fragrance (or you add essential oils), turn them into a beautiful potpourri.
- Mix and Match: Combine dried petals with other dried botanicals, spices (like cinnamon sticks or star anise), and a few drops of your favourite essential oils.
- Display: Place your potpourri in decorative bowls, sachets, or clear jars to add a natural scent and visual appeal to your home.
6. Shadow Boxes and Keepsake Displays: A Curated Collection
As mentioned earlier, shadow boxes are excellent for displaying three-dimensional preserved flowers. But you can take it further by creating a multi-faceted keepsake display.
- Mixed Media: Combine your preserved blooms with other wedding day mementos, such as a piece of your veil, a boutonnière, a handwritten vow excerpt, or a special photo.
- Thematic Arrangement: Group flowers by type or color, creating a visually appealing arrangement within the box.
7. Wall Art and Collages: Personal Expressions
Beyond simple framing, think about creating larger, more intricate pieces of wall art.
- Botanical Collage: Use a collection of your pressed flowers to create a large-scale botanical collage on canvas or a sturdy board.
- Personalized Artwork: Incorporate your wedding date, initials, or a meaningful quote alongside your preserved blooms.
DIY Wedding Bouquet Preservation Checklist
Ready to tackle the DIY challenge? Here’s a quick checklist to help you get started:
Within 24-48 hours of your wedding
- Trim any damaged leaves or petals.
- Choose your preferred preservation method (air drying, silica gel, pressing, glycerine, wax dipping).
Gather Your Supplies
- Air Drying: Twine/rubber bands, hooks, a dark, dry, well-ventilated space.
- Silica Gel: Airtight container, silica gel, small paintbrush.
- Pressing: Absorbent paper, heavy books, or a flower press.
- Glycerine: Liquid glycerine, hot water, vase/container.
- Wax Dipping: Paraffin wax, double boiler/slow cooker, hanging space.
Follow the Steps for Your Chosen Method:
- Be patient and allow adequate drying time.
Once Preserved, Get Creative!
- Consider framing.
- Explore resin art.
- Create ornaments and potpourri or incorporate them into candles/soaps.
- Design a unique keepsake display.
If you are still planning your floral style, explore our guide on Simple and Modern Wedding Flower Theme Ideas to find inspiration that matches your bouquet and wedding aesthetic.
Final Thoughts
Your wedding bouquet is a beautiful symbol of love, joy, and new beginnings. By taking the time to preserve it through a DIY method at home you are safeguarding a precious memory. Each time you glance at your preserved blooms, you can travel back to that magical day, reliving the emotions and cherishing the love that started it all. Whether you choose to preserve your bouquet or surprise a loved one with fresh blooms with our flower delivery Bangalore, flowers will always continue to tell a beautiful story.
FAQs | Creative Ways to Preserve Your Wedding Bouquet
How do I preserve my own wedding bouquet?
Trim the stems, choose a preservation method like air drying or pressing, and follow the steps carefully.
What can I do with my bridal bouquet after the wedding?
Frame it, make resin art, turn it into potpourri, or keep it as a keepsake.
How to repurpose a bridal bouquet?
Use it for home decor, craft ornaments, candles, or resin jewellery.
What are common flower preserving mistakes?
Waiting too long, not drying properly, or exposing flowers to heat, moisture, or sunlight.
How do I preserve my wedding bouquet at home?
Use methods like air drying, silica gel, pressing, glycerine, or wax dipping.
Related Posts